Hello everyone! So today I have for you a tape manicure done with Orly- miss conduct and wild wisteria. For this look you will paint your nails with your lighter shade, in my case miss conduct and wait till it is completely dry. Usually when I wait I take this time to cut my strips of tape. When my polish is dry I then place my strips of tape where I want them and paint the darker color you choose, my case wild wisteria on top. NOTE: do one nail at a time, I find the tape leaves residue on the nail if left on too long. Make sure to remove the tape as fast as possible so that your lines stay crisp. Wait until dry to apply top coat and then your done!
Unfortunately I won't be making another post for a week and a bit. I'm heading out of town and where ill be doesn't have Internet. But make sure to check back at the end of next week and ill post the minute I'm back!! Have a great week everyone!
Let me know what you think of my nail pattern I always like hearing from you guys. :)
Showing posts with label Tape Manicure. Show all posts
Wednesday, 9 January 2013
Saturday, 10 November 2012
RED- horizontal stripes
Hello my dear readers! Well this time around I did a
beautiful red base called Malaga Wine. This has been in my collection since the
beginning. I just love the deepness of it! I was actually just going to go with
the red nails and then I saw my old post (Triangle tips). It made me want to do
something similar with my red nails. I went with horizontal half stripes on the
side of my nails. It doesn’t take too
long to do these kinds of nails, but its just time consuming. And another thing
I see with using tape… when I tend to tape up all my nails and then paint my
nails, I get this tape residue when I remove it. So I guess I have to do this
look nail by nail. I am still new to tape manicures, I used to everything free
hand and it wasn’t always the straightest haha. Practice makes perfect! I drew up a little picture to show you how i placed the tape and where i painted! Have fun!!
Friday, 2 November 2012
Miami Beat!
Tonight’s manicure was inspired by the beautiful Miami
beaches! Never been there, but I envision the beaches with blue and white
towels laying on them. Ah a beautiful sight considering winter is coming here! The
weather got so ugly today I wish that I could catch a plane and go lie down on
one of my striped towels!
Sunday, 28 October 2012
Party Streamers!
Labels:
blue,
China Glaze,
Essie,
fuchsia,
OPI,
purple,
Tape Manicure,
teal,
yellow
Thursday, 18 October 2012
Blue Blue Blue
Blue Blue Everywhere!
I didn't quite know where I was headed with this manicure. Its the first time I actually didn't have an idea in my head for my nails. All I knew was that I wanted something with blue. So I started off my manicure with Just Groovy by OPI.
When this was Completely dry I started to add my tape strips. I did the white first and then let it dry, and then did the two blues. (Russian Navy from OPI and Splish Splash from China Glaze) I found that it looked lightly still plain even with the white and blue stripes,so I added a small line of fine silver sparkles. To finish I used one coat of Last Friday Night by OPI's Katy Perry line.
Monday, 15 October 2012
Purple Ribbons!
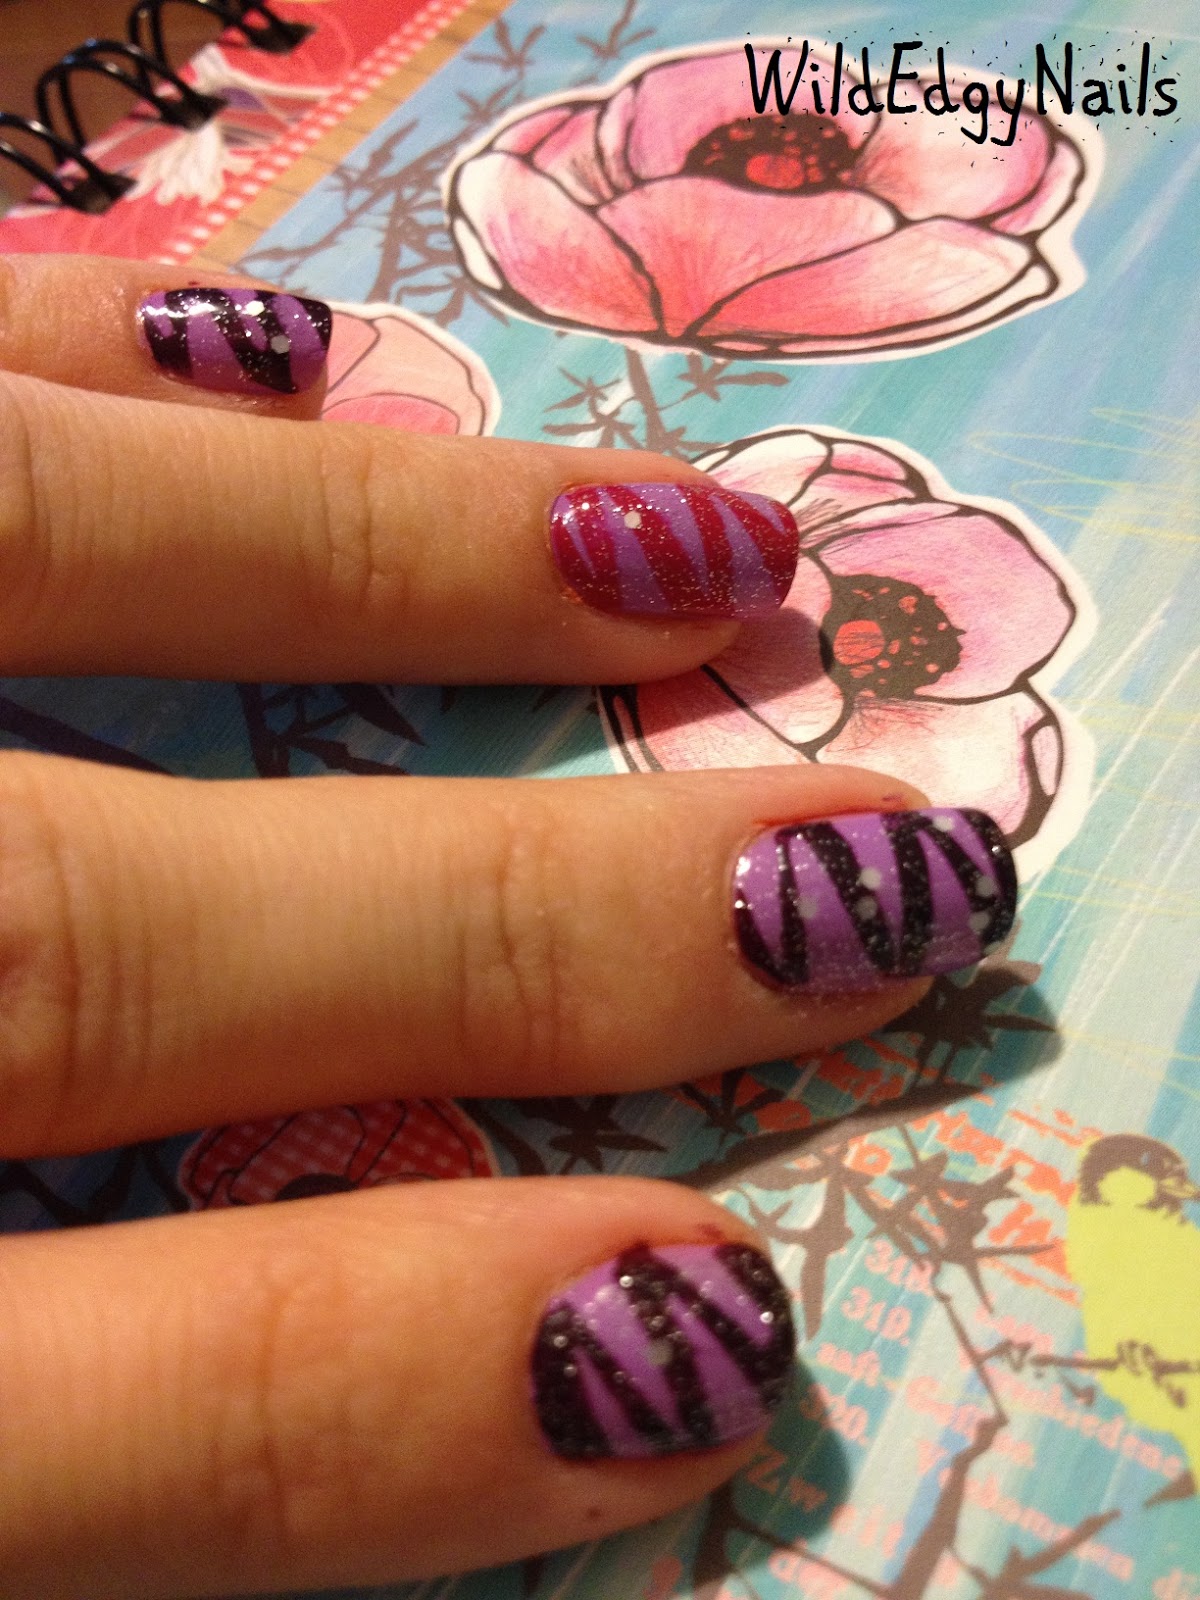
Purple Ribbon Manicure
Today I did another tape manicure but its something that I haven't really tried much. I don't really know the proper name for this manicure so I named it purple ribbons! It reminds me of having small ribbons wrapped around my nails.
I found it pretty easy to do, yet a little time consuming. Luckily I had an afternoon free before I go see Russell Peters!
The colors I used today were OPI- Honk if you love OPI, OPI- pirouette my whistle, Essie- exotic Liras and Essie- Play Date.
So I started off with my light purple base color from Essie (play date), and I waited until it was completely dry. The color itself is extremely beautiful on its own as well.
Once they were dry I cut out small thin triangle pieces of tape and placed them spaced out but one on top of the other. Like below.
Once you have all your tape in place, you are ready to apply your ribbon colors. I used Honk if you love OPI and Essie's Exotic Liras. Remove the tape ASAP, or else your lines wont be crisp. once everything was done and dry i covered it with Pirouette my whistle and finished with my top coat!
Friday, 12 October 2012
Triangle Tips
Triangle Tips
Hello friends! So tonight I tried an inspired manicure from a woman (Nailside) that I admire in the nail world. You can check out the original version at her blog through this link. http://nailside.blogspot.ca/2011/10/pyramid-tips-with-essie-fair-game_2465.html She has a ton of amazing nail ideas. I can only hope she is proud of my version. Thanks!
What I used as my basecoat tonight was vermillionaire from Essie and the accent color was velvet voyeur again from Essie. I always loved the pairing of oranges and plums. being near Halloween it works especially well :). The idea is pretty simple really. You create a triangle pattern with your tape and then lay two horizontal pieces across to achieve the gaps. Just make sure that your basecoat is completely dry, otherwise you will pull it all off when you pull your tape off.
I had so much fun doing this pattern, I'd like to thank Nailside for the great idea again. :)
Monday, 8 October 2012
Pink Candycane
Pink Candy Cane Manicure
This was my Favorite manicure I've done. I loved the color combo and the sparkles!
Subscribe to:
Posts (Atom)