Water Marbling Tutorial
Hello everyone! Today I thought I would add my water marbling tutorial. Originally I had made it as a guest blogger on my great friend Catrinel's blog. Thanks again for letting me show everyone on your blog how to do this! You can check out her amazing blogs at http://www.polishedchronicles.com/
So to start off you would need:
- a small bowl of room temperature water (preferably a bowl you don’t care about because you will get nail polish on the edges of it)
- toothpicks
- q-tips
- chapstick or tape
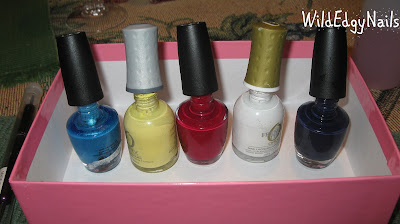
- your choice of any nailpolishes around 3-4
- nail polish remover
The colors I chose to use:
OPI – teal the cows come home (sparkle blue)
OPI- manicurist of Seville
(red)
OPI- road house blues (dark blue)
Tutorial Step One
Start off with your nails already painted and dried. I chose
white as my basecoat so that the bright colors that I am going to use really
pop out. I chose to only do one nail as my pattern so that it stands out on its
own. Feel free yourself to do as many as you want, you just need to repeat the
steps for each nail.
The thing with water marbling is that you are literally
sticking your finger into a bowl of nail polish. This is where the chapstick or
tape comes in handy. You want to rub it
all over your finger where the skin is exposed so that it is easy to wipe the
nail polish off. If you forget, be prepared for a nightmare. It happened to me
when I first started to do this type of nail art and I spent an hour removing
the nail polish from my skin.
Step Two
So if you haven’t figured it out yet, step two would to be
to apply a generous amount of chapstick to your finger! Don’t forget the back
of your finger as well as under the nail. I have seen this step done with tape
as well. You would tape your whole finger up and leave only the nail exposed.
Another thing you can use is cuticle oil or Vaseline.
Step Three
This is the fun part!
Make sure to have all the caps of your nail polish open so that it will
be easy to access your nail polish fast. You want to do this step a little
quick so that the nail polish doesn’t have time to set on top of the water.
What you will do is take a generous amount of nail polish onto the brush and
drop a bead into the water. You may want to test a few colors out before you
start to see if they easily spread. Some nail polishes are thick and may sink
to the bottom, that won’t be helpful at all. I have had great success with Orly
and OPI, Essie is also a good brand.
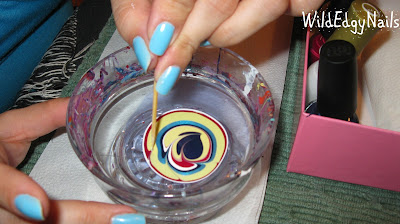
Drop the colors one on top of the other. You should come out
with a ringed pattern, see below.
Step Four
Take your toothpick and start making a pattern. I generally
like to start from the middle to the exterior and see what I get. I have seen
people start from the outside in but in my opinion I find the nail polish dries
fast on the outside and you end up pulling it all into a clump and have to
start over. Starting from the middle I find it’s wet and allows you to work
freely without the clump.
Step Five
Dip your finger into the polish right after you finish
making your pattern. If you wait too long the polish will dry, so make sure you
have your finger covered already! When your nail is under the water you can use
the toothpick and skim the top of the water to remove the excess polish from
the surface. I use a twirling motion and it collects it super fast. When you
are finished doing that remove your nail and flick off the excess water sitting
on top of your nail.
TIP
If you are going to do all your nails don’t forget to really
clean the top of the water. I run my toothpick around it to really make sure I
have collected all the little bits that may be floating on the surface. You
don’t want them floating around for your next pattern.
Step Six
Clean the polish off your skin. I use q-tips or a cotton pad
for a quick wipe, you will figure out what’s an easy way for you with time. For
the hard to reach bits I use an old make up brush dipped in acetone or nail
polish remover and clean them up with that.
Step Seven
Wait a bit before you put your top coat on or your will
bleed the colors together.
Another thing you can do which I show in the pictures is add
dots on the sold spots. It gives it a little pizzazz.
And your done!


No comments:
Post a Comment